Code 1 – Change the Color of a Part When A Player Touches It
You can copy the code snippet below to change the color of a Block to red when a player touches it.
local platformOne = script.Parent
local red = Color3.fromRGB(255, 0, 0)

local function onTouch(toucher)
	print("Someone (or something) touched PlatformOne")
	-- Other objects (non-Humanoid ones) can touch the platform as well
	-- This can occur even as a Player breaks apart (some Player "pieces" are non-humanoid)
	-- So, check if the object touching has a Parent and a Humanoid property
	-- If it DOES, we know it's a player.
	-- Only then, set the platform's Color to red
	-- This avoids an error when Roblox can't find the .Humanoid property of whatever touched the platform.
	if toucher.Parent and toucher.Parent:FindFirstChild("Humanoid") then
		platformOne.Color = red
	end
end

platformOne.Touched:Connect(onTouch)
Step 1 – Add the Script to a Part
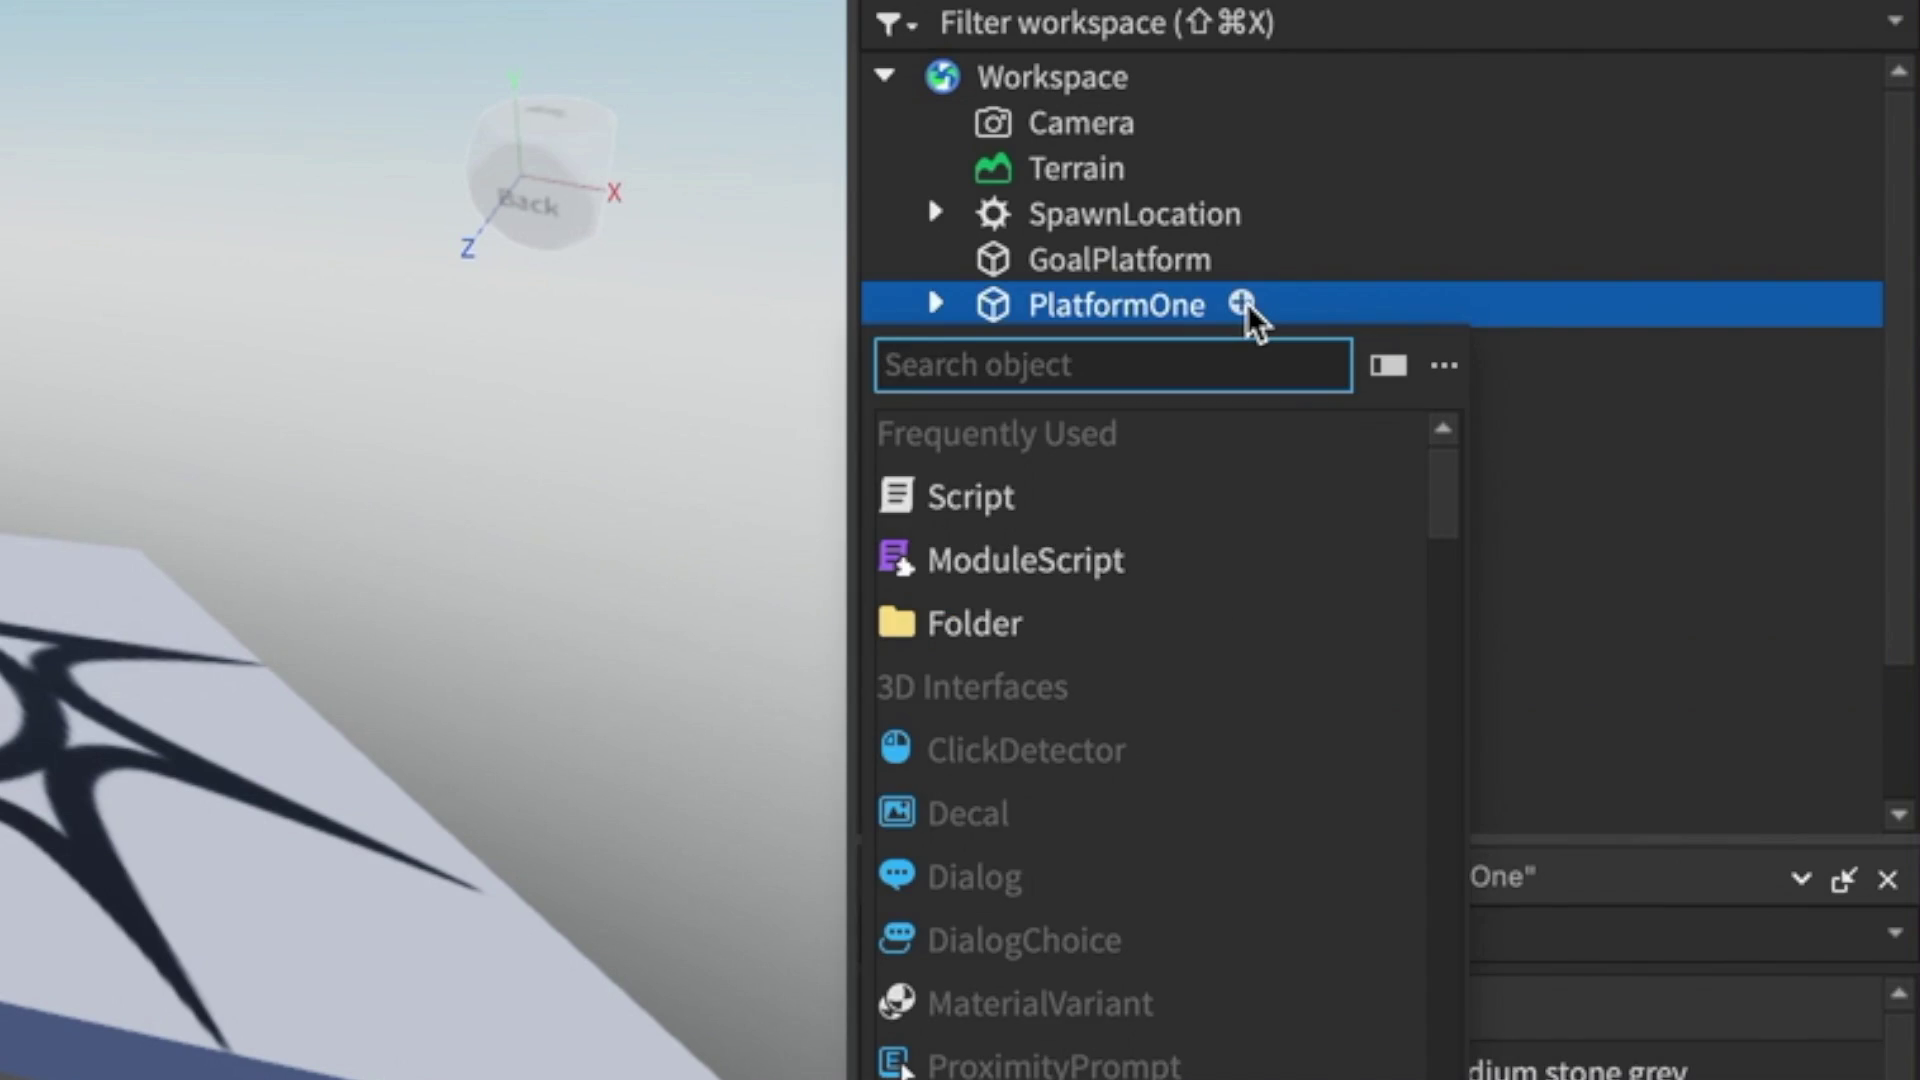
Hover over the Part for which the color will change. Add a Script to it. In Roblox, the Part is the Parent of the Script, and the Script is a Child of the Part. Double click the Script to open and edit it in the Roblox Studio Script Editor.
Step 2 – Declare and Initialize Variables
This code:
local platformOne = script.Parent
applies the variable name: platformOne to the Parent Part of the Script we’re writing. This tells Roblox, everywhere in our code where we see: platformOne, we’re referring to this Part. The local keyword tells Roblox that this variable will only be available in this particular Script. If we write another Script somewhere else, Roblox won’t know what platformOne means.
The code:
local red = Color3.fromRGB(255, 0, 0)
creates a variable called: red, and uses the Roblox built-in datatype, Color3, to create the color red from RGB values. But, how do we know what sort of built-in code, datatypes, and functions the Roblox Coding Engine offers us? And how can we figure out exactly what this code does and how to use it? We can look at the Code Documentation Reference. The Color3 datatype, for example, is described in this part of the Robolox Engine API.
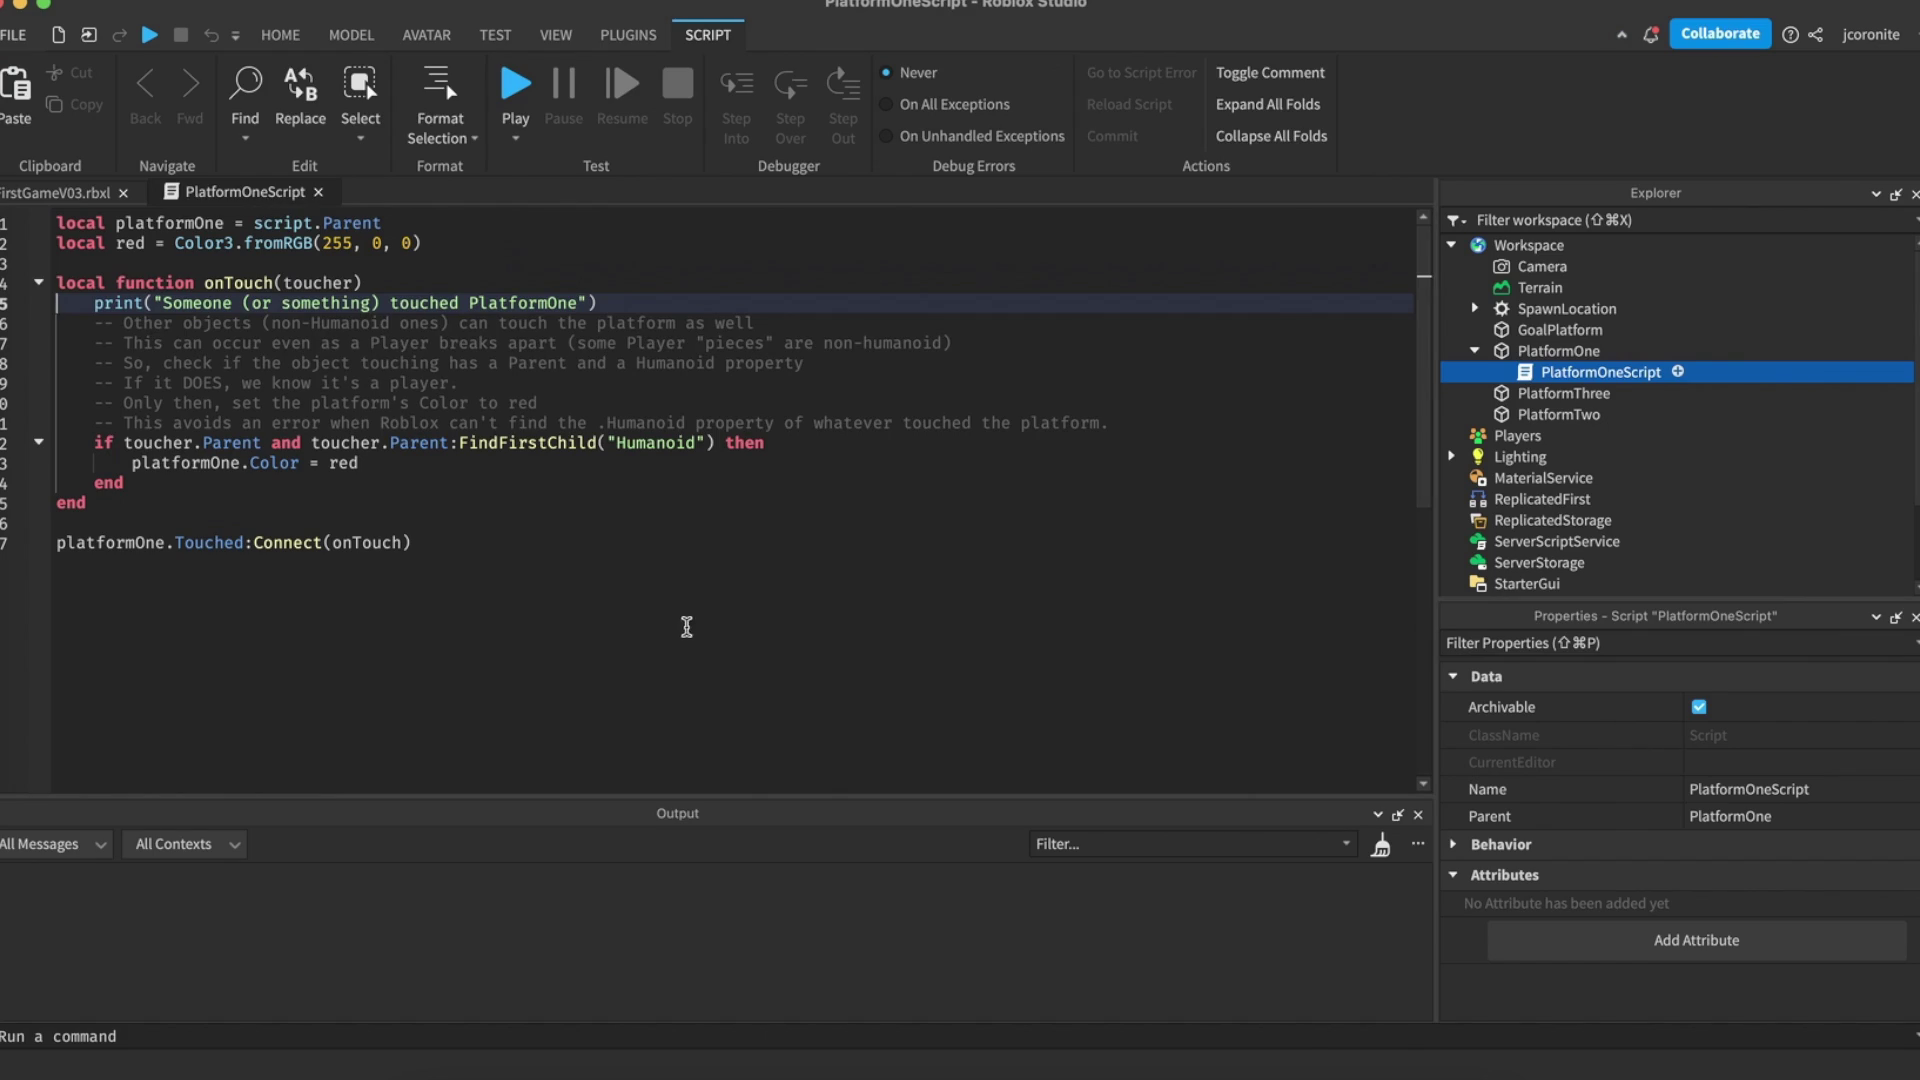
Step 4 – Define the Function to Tell Roblox What To Do When A Player Touches The Block
This function:
local function onTouch(toucher)
	print("Someone (or something) touched PlatformOne")
	if toucher.Parent and toucher.Parent:FindFirstChild("Humanoid") then
		platformOne.Color = red
	end
end
tells Roblox that, if a Player touches the Block, to turn the block red (note that the comments in the code were not included here. ) To help you know the code is running, this code also prints: Someone (or something) touched PlatformOne to the console. We used the function keyword to tell Roblox that we’re defining a function, we named our function: onTouch, and we gave our function a parameter called toucher (to represent the Player or Object doing the touching) because we need to test exactly what is touching our Block. We only want the block to turn red if a Player touches it.
Step 5 – Connect the Above Function to the Touched Event for This Block
Just like a recipe is useless if you never cook it, a function is useless if you never call it. We have to tell Roblox exactly when to perform the function’s actions. To do this, we connect the function to the Block’s built-in Touched event like so:
platformOne.Touched:Connect(onTouch)Now, whenever the Block is touched, our function will determine if it was touched by a player. If is was, the Block will turn red.
Code 2 – Make a Random Block a Trap “Kill Block”
You can copy the code snippet below to make a random Block (out of three Blocks) a trap “Kill Block” which will disappear when a Player touches it, and which will set the Player’s Health to 0.
local platform_one = game.Workspace.PlatformOne
local platform_two = game.Workspace.PlatformTwo
local platform_three = game.Workspace.PlatformThree

-- Produces 1, 2, or 3
local random_number = math.random(1, 3)
local trap = nil

if random_number == 1 then
	trap = platform_one
elseif random_number == 2 then
	trap = platform_two
elseif random_number == 3 then
	trap = platform_three
end

local function onTouch(toucher)
	print("Someone (or something) touched the trap")
	-- Destroy the object DOING the touching (a particular player)
	-- When a player breaks apart, other objects (non-Humanoid ones) will touch the platform as well
	-- So, check if the object touching has a Parent and a Humanoid property
	-- If it DOES, we know it's a player.
	-- Only then, set its Health to 0.
	-- This avoids an error when Roblox can't find the .Humanoid property of whatever touched the platform.
	if toucher.Parent and toucher.Parent:FindFirstChild("Humanoid") then
		toucher.Parent.Humanoid.Health = 0
	end

	-- Destroy the object BEING touched (the trap platform)
	trap:Destroy()
end

-- Connect the function to the Touched event
-- The function supplied to the Connect function is: onTouch
-- Therefore, the onTouch function is automatically supplied with
-- a parameter which represents the object
trap.Touched:Connect(onTouch)
Step 1: Add a Script to the ServerScriptService
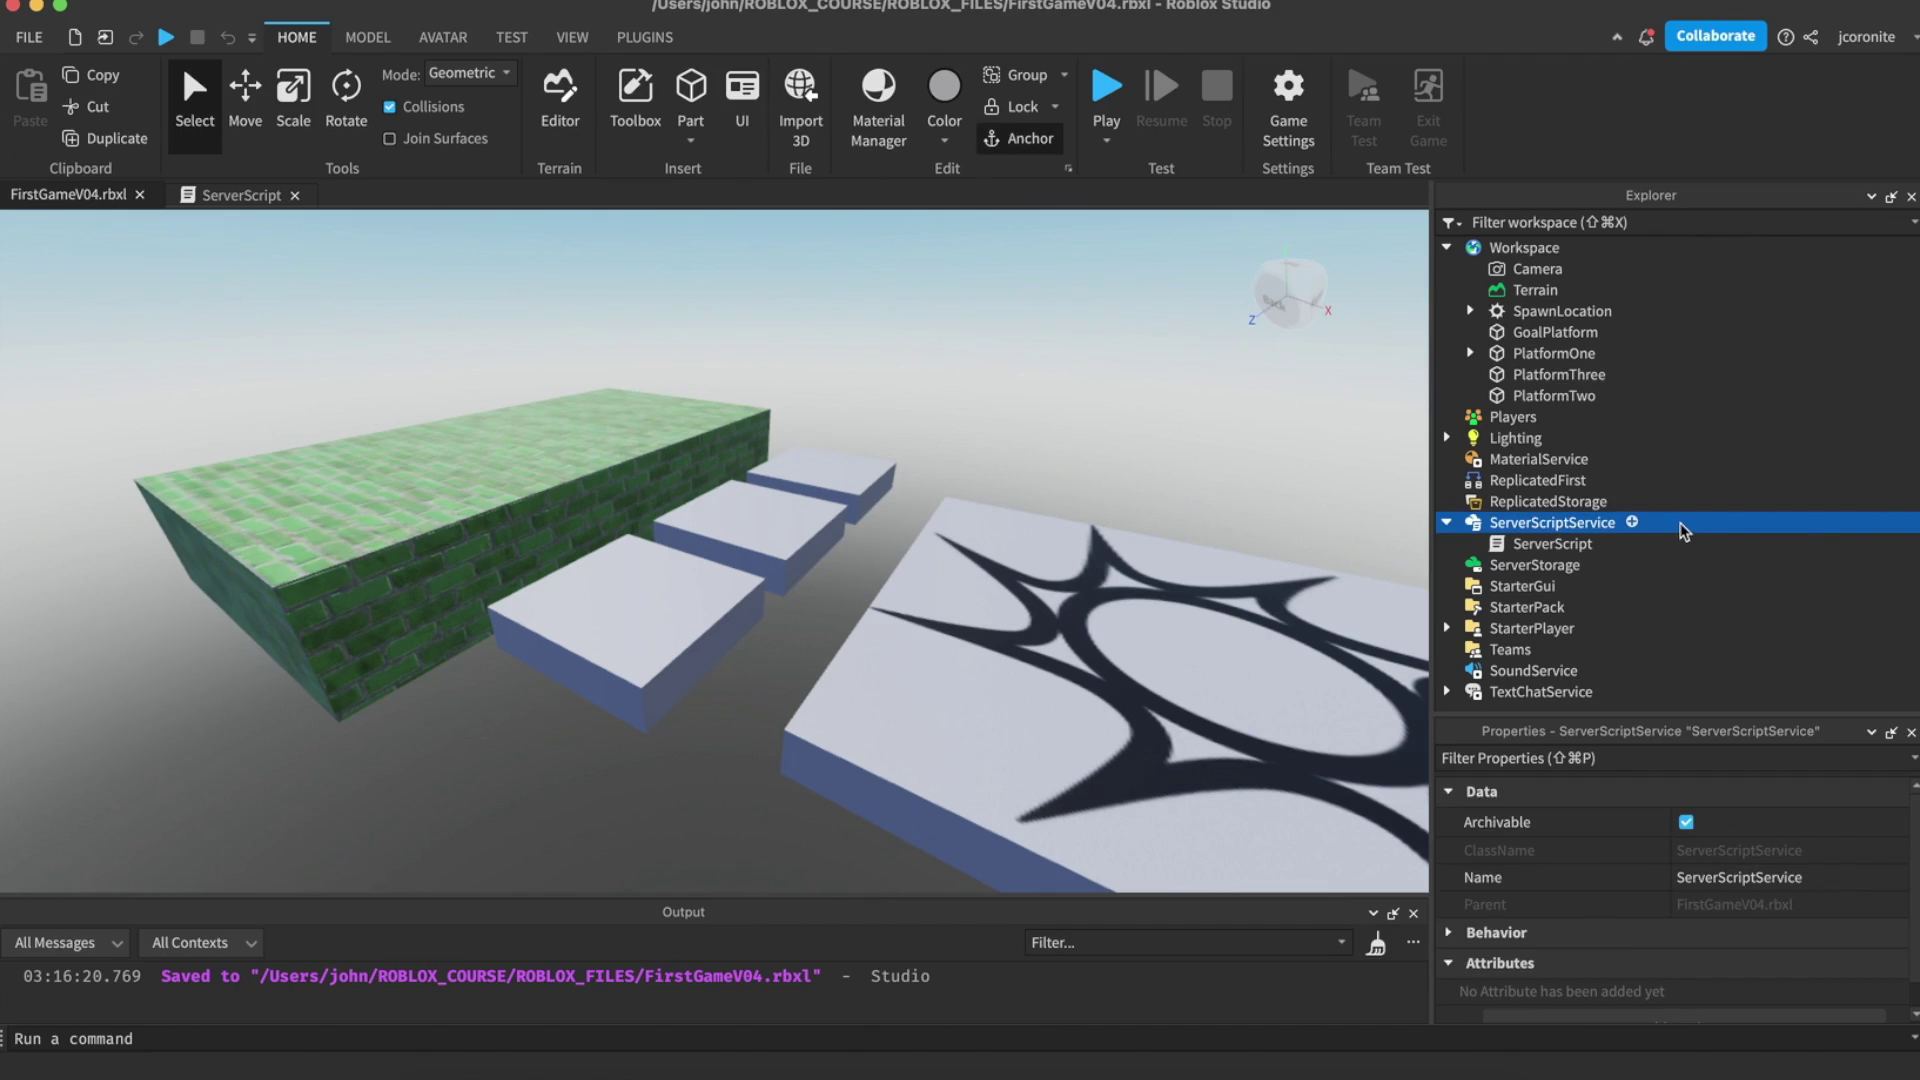
Unlike the previous code which only needed to reference one particular Part (to turn it red), this code will need to reference several different parts. For this reason, we add our Script as a Child of the ServerScriptService.
Step 2 – Create and Initialize Variables for the Three Platform Blocks
This code:
local platform_one = game.Workspace.PlatformOne
local platform_two = game.Workspace.PlatformTwo
local platform_three = game.Workspace.PlatformThree
creates three variables for three Blocks in our Obby scene. Note that PlatformOne, PlatformTwo, and PlatformThree are the EXACT names we gave to the three Blocks in the Explorer Workspace when we created them. If your Blocks are named differently, the code given won’t work.
Step 3 – Create a Random Number (Integer from 1 to 3)
This code:
local random_number = math.random(1, 3)Gives the variable: random_number a value of 1, 2, or 3 using the Lua programming language’s math.random() function.
Step 4 – Create a Variable for the Trap and Set It Based On the Random Number
This code:
local trap = nil

if random_number == 1 then
	trap = platform_one
elseif random_number == 2 then
	trap = platform_two
elseif random_number == 3 then
	trap = platform_three
end
creates a variable called: trap and sets it’s value to nil (nothing.) We then use an if-elseif statement to set the value of the trap variable based upon the value of random_number.
Step 5 – Define the onTouch Function
The onTouch() function is similar to the previous one we’ve seen, but in this one, touching the trap sets the Player’s health to 0:
toucher.Parent.Humanoid.Health = 0We also destroy the trap using the Object’s built-in Destroy() method/function:
trap:Destroy()Step 6 – Connect the onTouch Function to the Touched Event for the Trap
Connecting our onTouch function to the trap is similar to what we did in our first code:
trap.Touched:Connect(onTouch)Additional Roblox Tutorials
Roblox offers many online tutorials to help beginner Roblox developers. The tutorials below show you how to collect coins, display player data on a leaderboard, create hazards, and exchange coins for jump power.
Create a Coin Collection Mechanic
This mechanic allows players to collect coins, and disables the collection of a coin if it’s been recently collected.
https://create.roblox.com/docs/tutorials/core/scripting/script-game-behavior
Record and Display Player Data
Now that you can detect when a player has collected a coin, this section of the tutorial teaches you how to count how many coins players have collected, and make that amount visible on a leaderboard.
https://create.roblox.com/docs/tutorials/core/scripting/script-game-behavior
Create Player Hazards
Hazard objects decrease the health of players when they touch them. As a simple starting point, this section of the tutorial teaches you how to create one large invisible part at the same level as the water in your experience, so that falling into the hazard changes the player’s health to zero and respawns them back to the start of the experience.
https://create.roblox.com/docs/tutorials/core/scripting/create-player-hazards
Script an Upgrade Button
Players can now collect coins and lose them when they die, but the coins don’t do anything, and most of the game world is inaccessible without the ability to jump very high. This section of the tutorial teaches you how to finish the logic for your experience by adding an on-screen button that spends coins to increase jumping power.
https://create.roblox.com/docs/tutorials/core/scripting/script-game-behavior